jMeter is an Open Source testing software. It is 100% pure Java application for load and performance testing. jMeter is designed to cover categories of tests like load, functional, performance, regression, etc., and it requires JDK 5 or higher. This tutorial will give you great understanding on jMeter framework needed to test an enterprise level application to deliver it with robustness and reliability.
Writing a Test Plan
Follow the steps given below to write a test plan −
Step 1 − Start the JMeter Window
Open the JMeter window by clicking /home/manisha/apache-jmeter-2.9/bin/jmeter.sh. The JMeter window will appear as below −
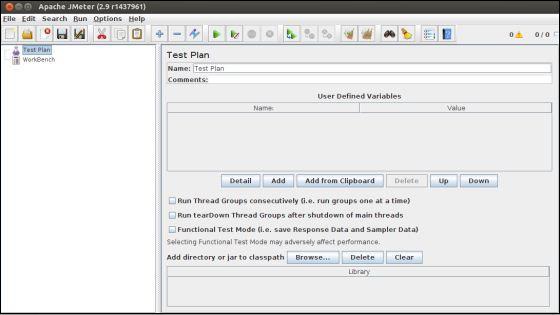
This is a plain and blank JMeter window without any additional elements added to it. It contains two nodes −
- Test Plan node − is where the real test plan is kept.
- Workbench node − It simply provides a place to temporarily store test elements while not in use, for copy/paste purposes. When you save your test plan, Workbench items are not saved with it.
Step 2 − Add/Remove Elements
Elements (which will be discussed in the next chapter Test Plan Elements) can be added to a test plan by right-clicking on the Test Plan node and choosing a new element from the "add" list.
Alternatively, you can load an element from a file and add it by choosing the "merge" or "open" option.
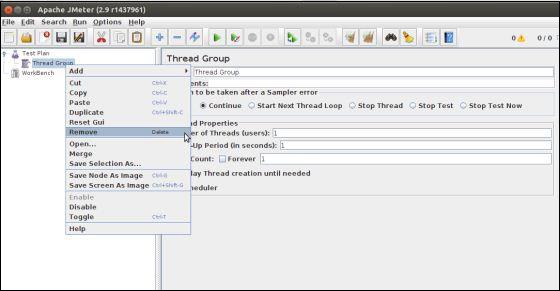
For example, let us add a Thread Group element to a Test Plan as shown below −

To remove an element, make sure the element is selected, right-click on the element, and choose the "remove" option.
Step 3 − Load and Save the Elements
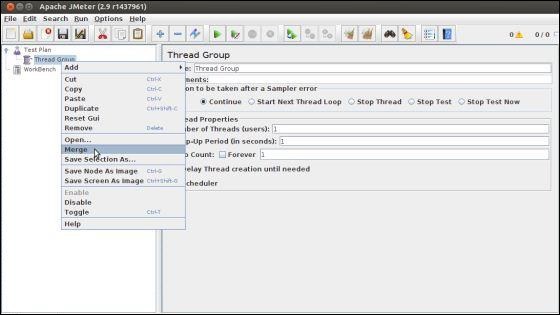
To load an element from file −
- Right-click on the existing tree element to which you want to add the loaded element.
- Select Merge.
- Choose the file where you saved the elements.
- JMeter will merge the elements into the tree.
By default, JMeter does not save the element, you need to explicitly save it.
To save tree elements −
- Right-click on the element.
- Choose the Save Selection As ... option.
JMeter will save the element selected, plus all the child elements beneath it. By default, JMeter doesn't save the elements, you need to explicitly save it as mentioned earlier.
Step 4 − Configuring the Tree Elements
Any element in the Test Plan can be configured using the controls present in JMeter's right-hand side frame. These controls allow you to configure the behavior of that particular test element. For example, the Thread Group can be configured for a number of users, ramp up periods, etc., as shown below −

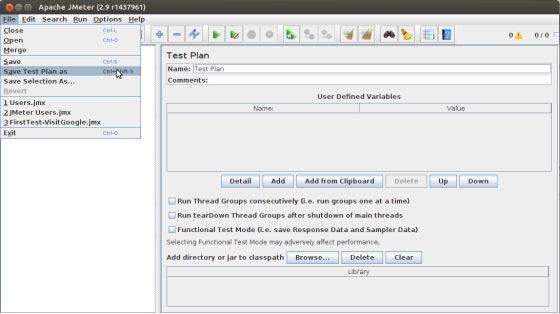
Step 5 − Saving the Test Plan
You can save an entire Test Plan by using either Save or "Save Test Plan As ..." from the File menu.
Step 6 − Run the Test Plan
You can run the Test Plan by clicking Start(Control + r) from the Run menu item. When JMeter starts running, it shows a small green box at the right-hand end of the section just under the menubar.
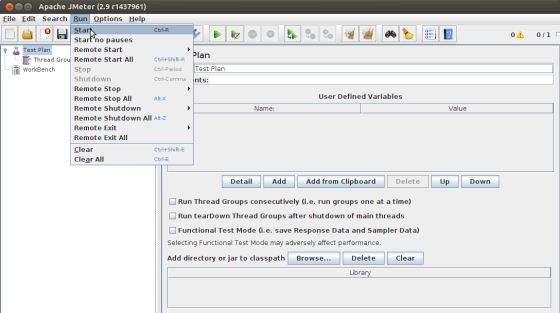
The numbers to the left of the green box are the number of active threads / total number of threads. These only apply to a locally run test; they do not include any threads started on remote systems when using client-server mode.
Step 7 − Stop the Test Plan
You can stop your test in two ways −
- Using Stop (Control + '.'). It stops the threads immediately if possible.
- Using Shutdown (Control + ','). It requests the threads to stop at the end of any current work.
Create Webservice Project
To create a webservice project, we have used Eclipse IDE. First write the Service Endpoint Interface HelloWorld under the packagecom.tutorialspoint.ws. The contents of the HelloWorld.java are as follows −
package com.tutorialspoint.ws;

import javax.jws.WebMethod;
import javax.jws.WebService;
import javax.jws.soap.SOAPBinding;
import javax.jws.soap.SOAPBinding.Style;

//Service Endpoint Interface
@WebService
@SOAPBinding(style = Style.RPC)

public interface HelloWorld{

   @WebMethod String getHelloWorldMessage(String string);

}
This service has a method getHelloWorldMessage which takes a String parameter.
Next, create the implementation class HelloWorldImpl.java under the package com.tutorialspoint.ws.
package com.tutorialspoint.ws;

import javax.jws.WebService;

@WebService(endpointInterface="com.tutorialspoint.ws.HelloWorld")
public class HelloWorldImpl  implements HelloWorld  {
   @Override

   public String getHelloWorldMessage(String myName){
      return("Hello "+myName+" to JAX WS world");
   }
}
Let us now publish this web service locally by creating the Endpoint publisher and expose the service on the server.
The publish method takes two parameters −
- Endpoint URL String.
- Implementor object, in this case the HelloWorld implementation class, which is exposed as a Web Service at the endpoint identified by the URL mentioned in the parameter above.
The contents of HelloWorldPublisher.java are as follows −
package com.tutorialspoint.endpoint;

import javax.xml.ws.Endpoint;

import com.tutorialspoint.ws.HelloWorldImpl;

public class HelloWorldPublisher {

   public static void main(String[] args){
      Endpoint.publish("http://localhost:9000/ws/hello", new HelloWorldImpl());
   }
}
Modify the web.xml contents as shown below −
<?xml version="1.0" encoding="UTF-8"?>
<!DOCTYPE web-app PUBLIC "-//Sun Microsystems, Inc.//DTD Web Application 2.3//EN" "http://java.sun.com/j2ee/dtds/web-app_2_3.dtd">

<web-app>

   <listener>
      <listener-class>
         com.sun.xml.ws.transport.http.servlet.WSServletContextListener
      </listener-class>
   </listener>

   <servlet>
      <servlet-name>hello</servlet-name>
      <servlet-class>
         com.sun.xml.ws.transport.http.servlet.WSServlet
      </servlet-class>
      <load-on-startup>1</load-on-startup>
   </servlet>

   <servlet-mapping>
      <servlet-name>hello</servlet-name>
      <url-pattern>/hello</url-pattern>
   </servlet-mapping>

   <session-config>
      <session-timeout>120</session-timeout>
   </session-config>

</web-app>
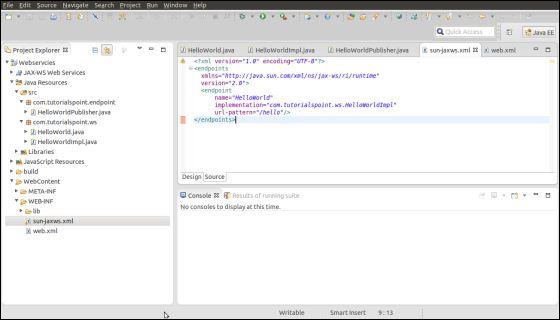
To deploy this application as a webservice, we would need another configuration file sun-jaxws.xml. The contents of this file are as follows −
<?xml version="1.0" encoding="UTF-8"?>
<endpoints xmlns="http://java.sun.com/xml/ns/jax-ws/ri/runtime" version="2.0">

   <endpoint name="HelloWorld" implementation="com.tutorialspoint.ws.HelloWorldImpl" url-pattern="/hello"/>

</endpoints>
Now that all the files are ready, the directory structure would look as shown in the following screenshot −
- Now create a WAR file of this application.
- Choose the project > right click > Export > WAR file.
- Save this as hello.war file under the webapps folder of Tomcat server.
- Now start the Tomcat server.
- Once the server is started, you should be able to access the webservice with the URL − http://localhost:8080/hello/hello
Create JMeter Test plan
Now let us create a test plan to test the above webservice.
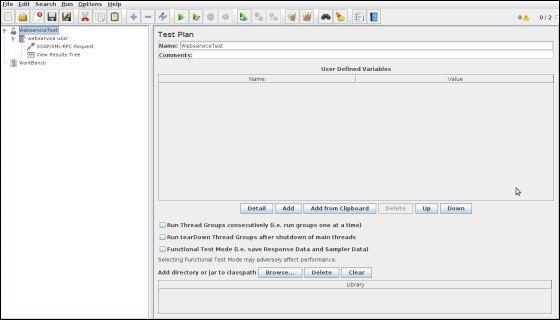
Rename the Test Plan
- Open the JMeter window by clicking /home/manisha/apache-jmeter2.9/bin/jmeter.sh.
- Click the Test Plan node.
- Rename this Test Plan node as WebserviceTest.
Add Thread Group
Add one Thread Group, which is placeholder for all other elements like Samplers, Controllers, and Listeners.
- Right click on WebserviceTest (our Test Plan) > Add > Threads (Users) > Thread Group. Thread Group will get added under the Test Plan (WebserviceTest) node.
- Next, let us modify the default properties of the Thread Group to suit our testing. Following properties are changed −
- Name − webservice user
- Number of Threads (Users) − 2
- Ramp-Up Period − leave the the default value of 0 seconds.
- Loop Count − 2

Add Sampler - SOAP/XML-RPC Request
Now that we have defined the users, it is time to define the tasks that they will be performing.
We will add SOAP/XML-RPC Request element −
- Right-click mouse button to get the Add menu.
- Select Add > Sampler > SOAP/XML-RPC Request.
- Select the SOAP/XML-RPC Request element in the tree
- Edit the following properties as in the image below −
- The following details are entered in this element −
- Name − SOAP/XML-RPC Request
- URL − http://localhost:8080/hello/hello?wsdl
- Soap/XML-RPC Data − Enter the below contents
<soapenv:Envelope xmlns:soapenv="http://schemas.xmlsoap.org/soap/envelope/" xmlns:web="http://ws.tutorialspoint.com/">

   <soapenv:Header/>

   <soapenv:Body>

      <web:getHelloWorldMessage>
         <arg0>Manisha</arg0>
      </web:getHelloWorldMessage>

   </soapenv:Body>

</soapenv:Envelope>

Add Listener
The final element you need to add to your Test Plan is a Listener. This element is responsible for storing all of the results of your HTTP requests in a file and presenting a visual model of the data.
- Select the webservice user element.
- Add a View Results Tree listener by selecting Add > Listener > View Results Tree.
Run the Test Plan
Now save the above test plan as test_webservice.jmx. Execute this test plan using Run > Start option.
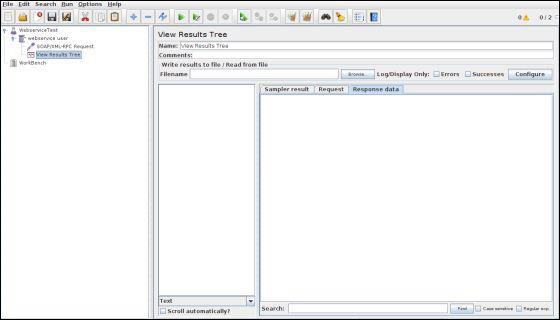
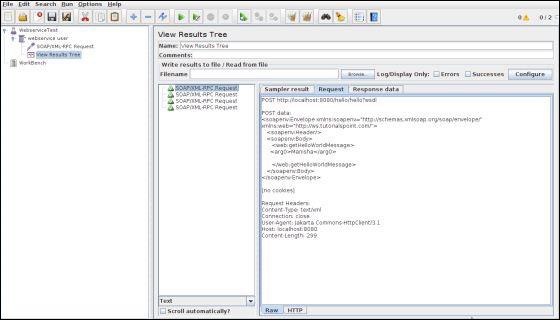
View the Output
The following output can be seen in the listener.
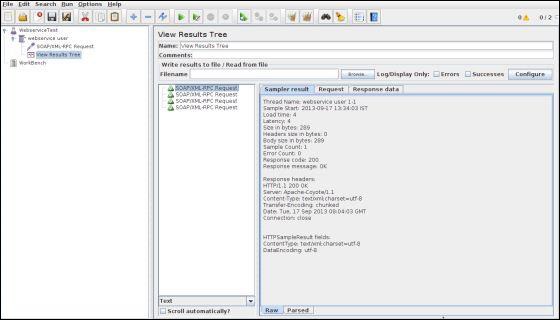
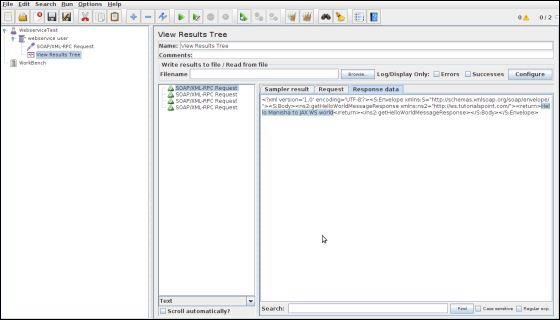
In the last image, you can see the response message "Hello Manisha to JAX WS world".
No comments:
Post a Comment